Level. Beginner ★☆☆
Introduction #
The MotorXP-AFM software consists of two main components for simulating electric motors and performing optimization — the main MotorXP application and Design Studio. In MotorXP-AFM version 2.0, Magnetostatic FEA was implemented in Design Studio, marking the gradual migration of all computations from the main application to Design Studio.
The steps for launching and setting up a Magnetostatic FEA calculation are largely similar across the two interfaces — the old one and the new one. We have prepared a description of how to perform Magnetostatic FEA analysis using both the old interface (MotorXP) and the new interface (Design Studio).
You can download the example model here: lumpedWinding.mxa.
click on image to enlarge
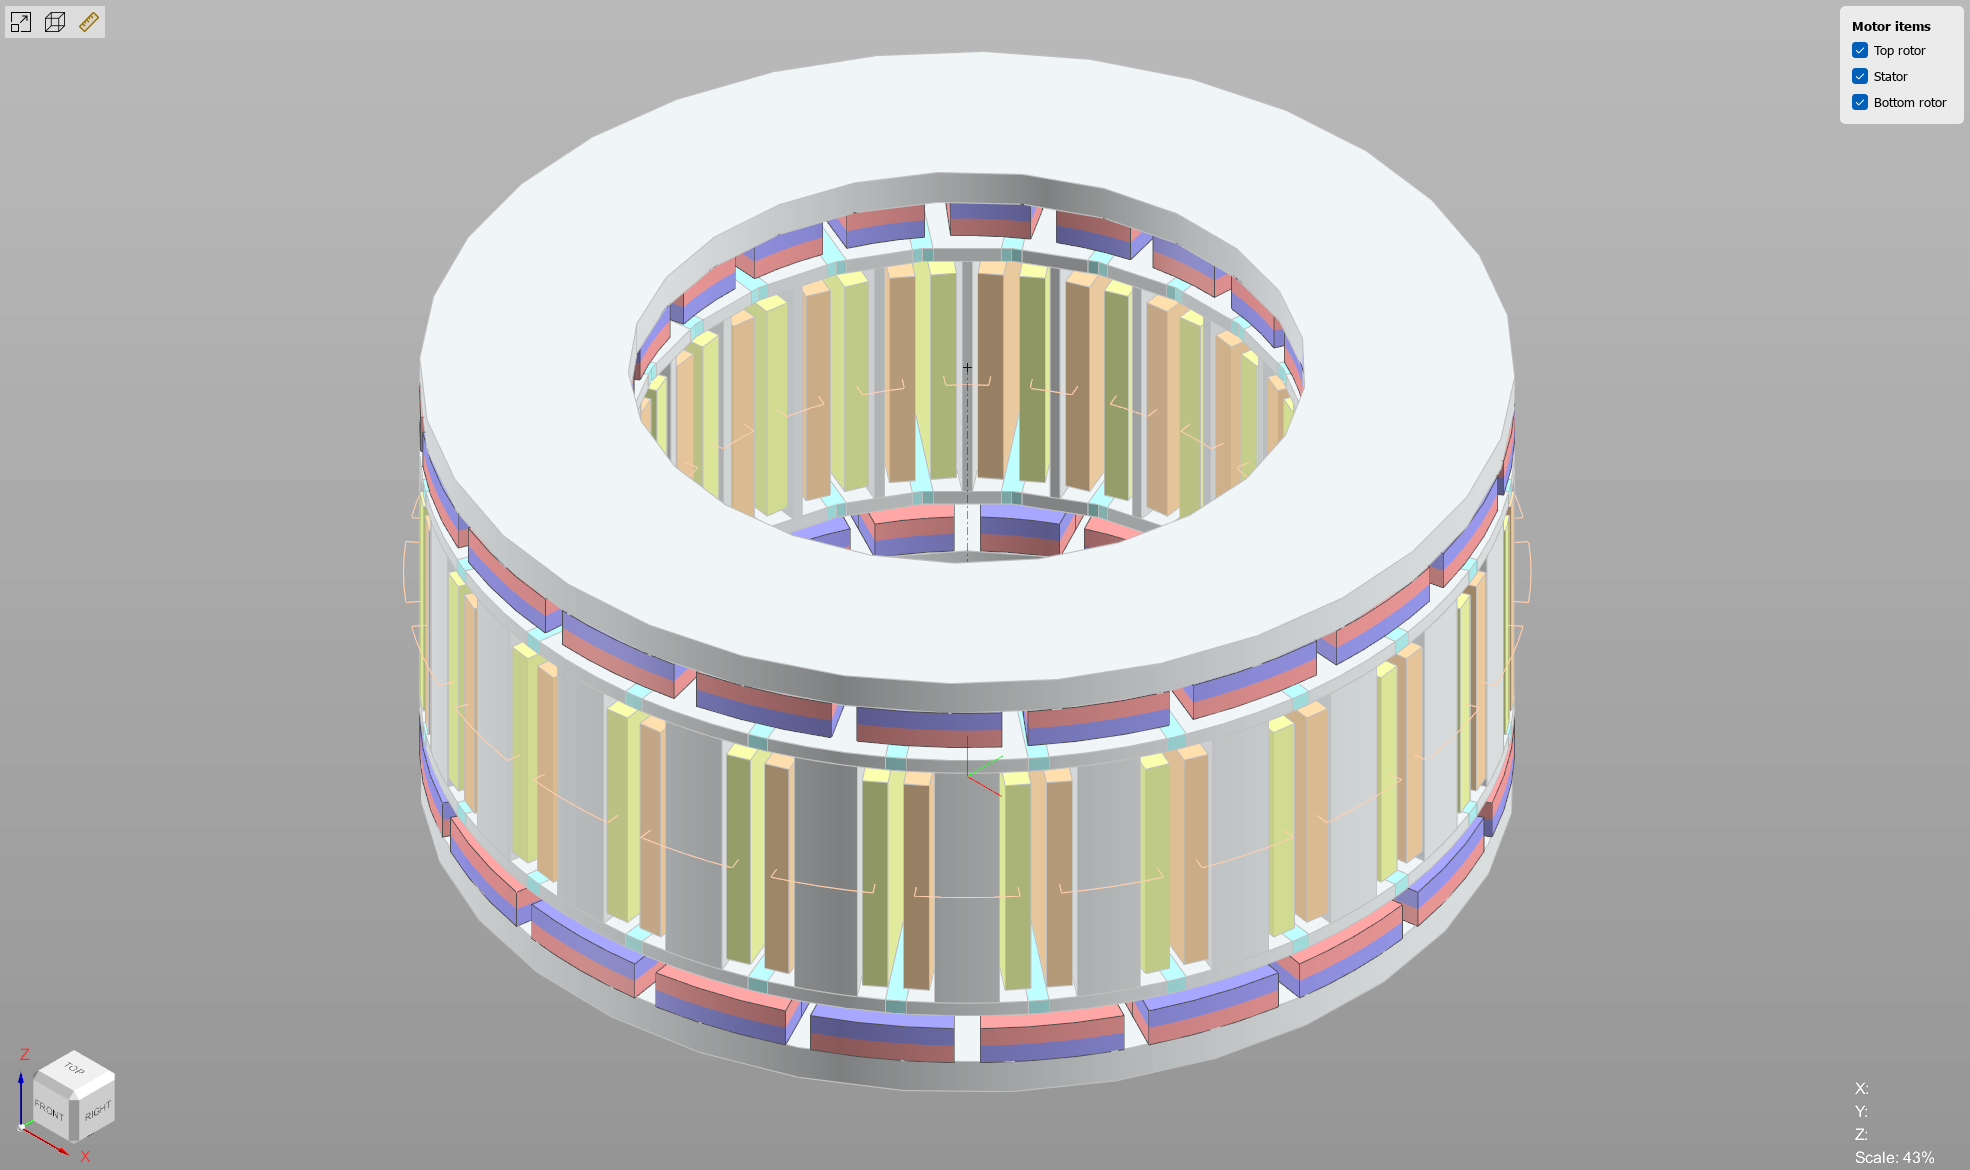
Figure 1. Motor model.
Steps in Magnetostatic FEA (MotorXP Matlab/Standalone) #
- Open the file lumpedWinding.mxa.
- Go to the Magnetostatic FEA tab.
- In Current waveform, select Sinusoidal.
- In Current input method, select RMS supply current (or Peak supply current, or RMS current density) and enter the value.
- Set Advance angle and Mechanical speed.
- In Simulation setup, choose the required accuracy. This affects the Discretization error, which you can check in General Results after the run; it should not exceed a few percent.
- Click Start magnetostatic simulation.
click on image to enlarge

Figure 2. Magnetostatic FEA setup with a sinusoidal current source.
- When the run finishes, find Stator winding losses in General Results.
click on image to enlarge
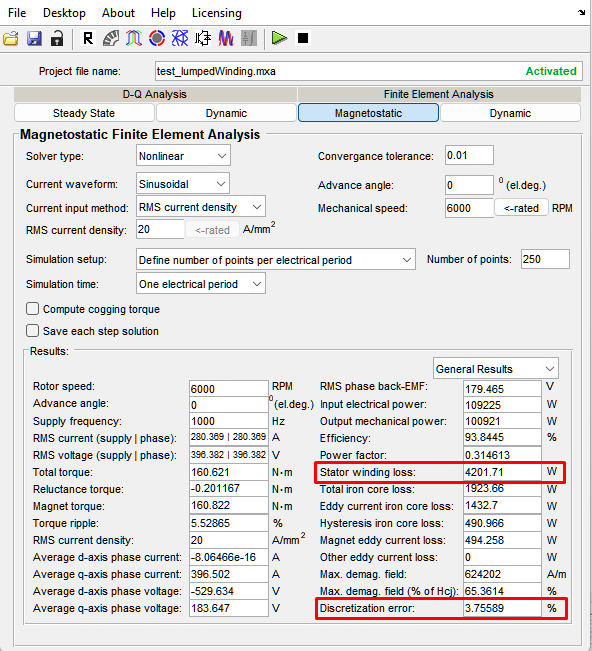
Figure 3. Stator winding losses reported in General Results.
- Save the project.
Steps in Magnetostatic FEA (Design Studio Matlab/Standalone) #
- Open the file lumpedWinding.mxa.
- Go to the Magnetostatic finite element analysis tab.
click on image to enlarge
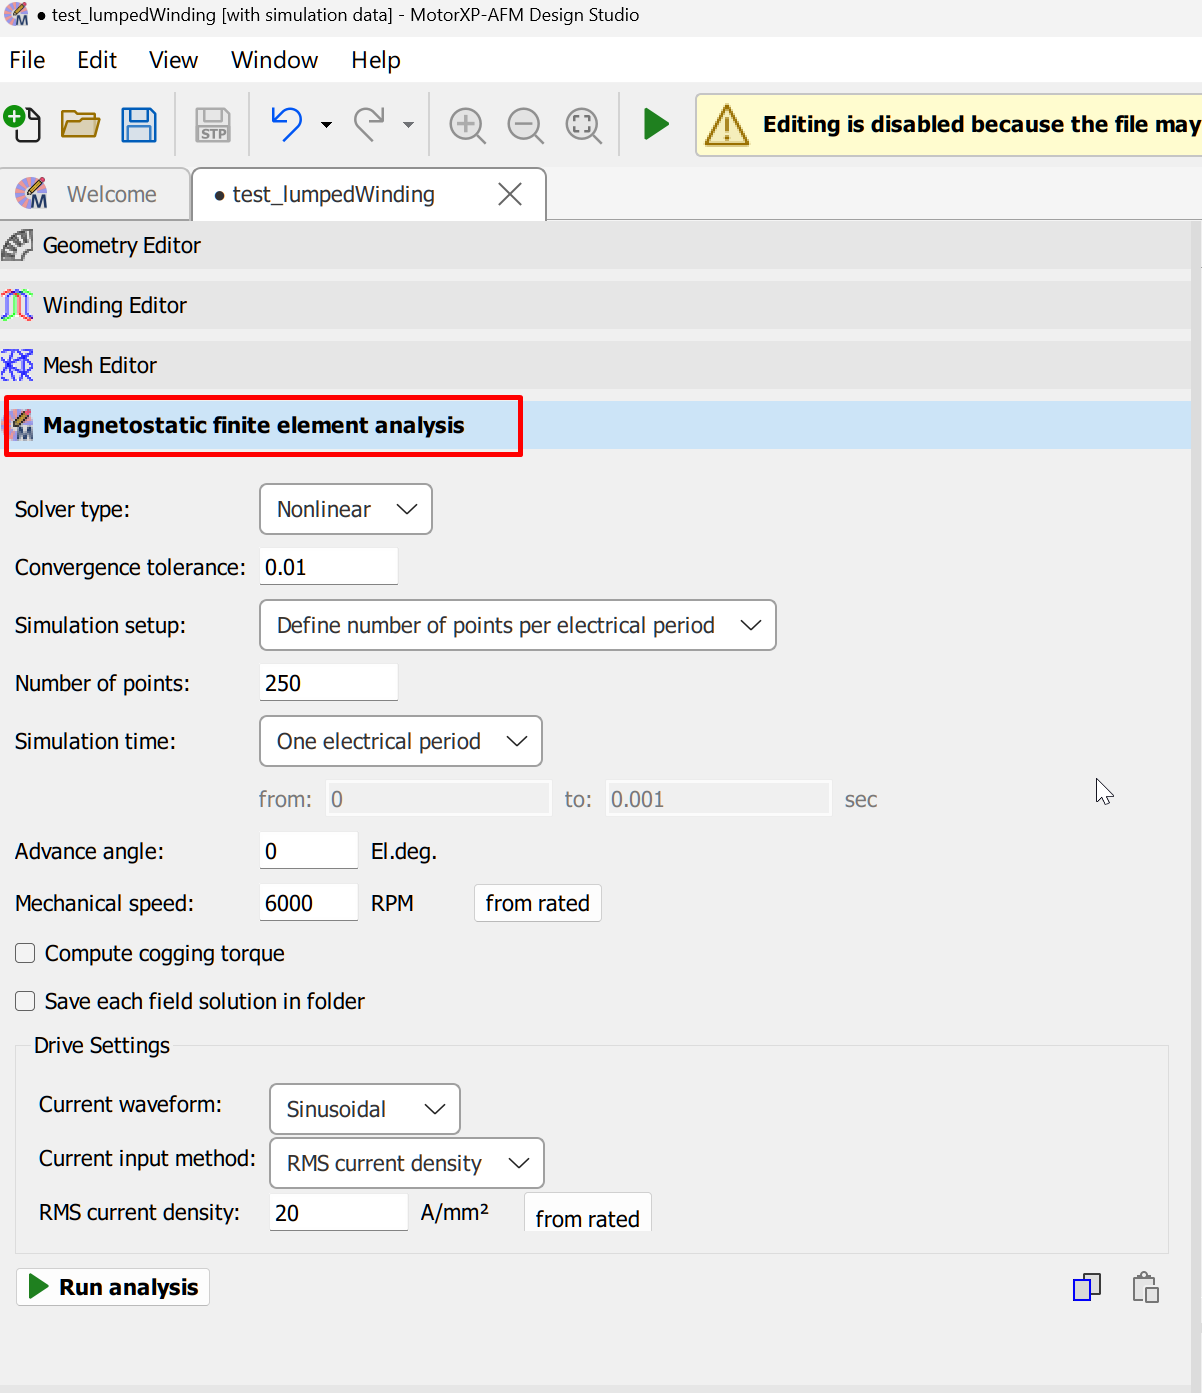
Figure 4. Magnetostatic FEA Tab (Design Studio).
- In Current waveform, select Sinusoidal.
- In Current input method, select RMS supply current (or Peak supply current, or RMS current density) and enter the value.
- Set Advance angle and Mechanical speed.
- In Simulation setup, choose the required accuracy. This affects the Discretization error, which you can check in General Results after the run; it should not exceed a few percent.
- Click Run analysis.
click on image to enlarge
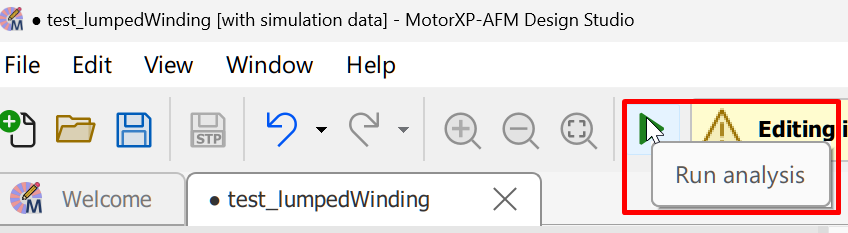
Figure 5. Magnetostatic FEA setup with a sinusoidal current source (Design Studio).
- When the run finishes, find Stator winding losses in Results.
click on image to enlarge
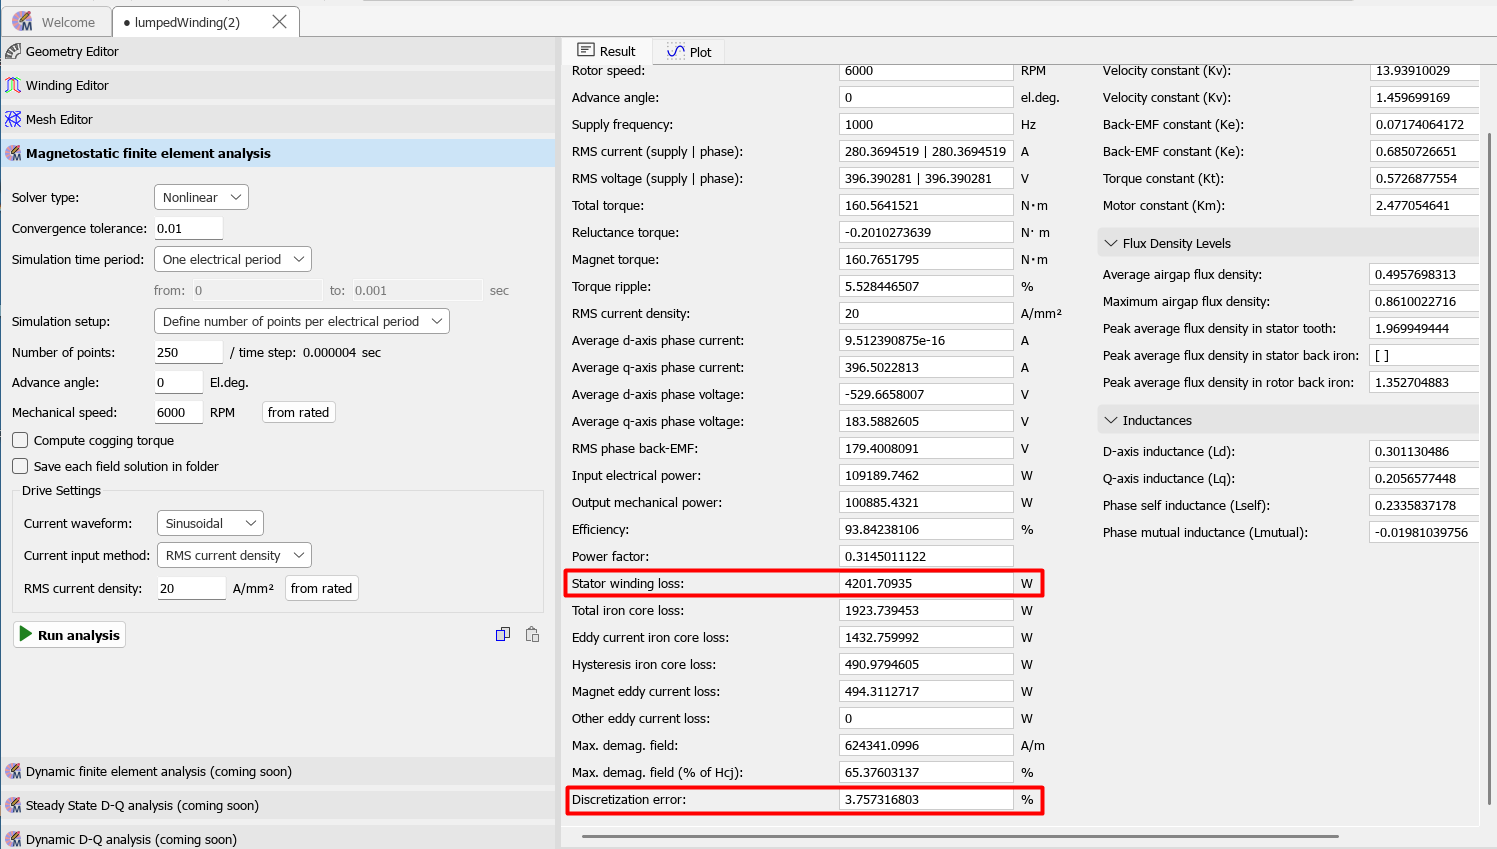
Figure 6. Stator winding losses reported in Results.


